Setting up an email campaign in AWeber is straightforward for local businesses, even for beginners. It helps you connect with customers efficiently using simple, guided steps.
First, sign up for AWeber’s free plan to access essential tools without cost. This is ideal for local businesses starting email marketing on a tight budget.
Next, create a list in AWeber to organize your subscribers effectively. You can upload existing customer emails or start fresh with new contacts from your business.
Moreover, head to the “Campaigns” section from the dashboard to begin setup. AWeber’s interface is user-friendly, making navigation easy for small business owners.
In addition, choose the “Create a Campaign” option and select a template. Pre-built options cater to local needs like promotions, events, or service updates.
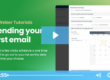
Furthermore, customize your campaign by adding emails with the drag-and-drop editor. Include local offers or store news to engage your community directly.
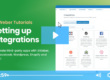
Also, set triggers to automate sending based on subscriber actions or schedules. For instance, send a welcome email when someone joins your list automatically.
Meanwhile, decide the frequency of emails, like weekly or after specific events. This ensures your local audience receives timely, relevant messages without overwhelm.
Additionally, use AWeber’s tagging feature to segment your list for targeted campaigns. Focus on specific customer groups, like loyal locals or new visitors, for better results.
On the other hand, preview and test your campaign before launching it live. Checking for errors ensures a professional impression for your local business.
Lastly, activate your campaign and monitor performance through AWeber’s analytics. Track opens and clicks to refine future efforts for maximum impact.
In summary, setting up an email campaign in AWeber is simple for local businesses. With intuitive tools and automation, you’ll reach customers effectively and grow relationships.
2 Comments