
Keep your customers informed automatically when you update your blog. Your WordPress blog can broadcast your latest content to your Aweber list in real time.
Face it, there seems like there is never enough time in the day to run our businesses, market for new customers and take very good care of our existing ones. We know we must keep a current “blog” with new offerings and special information to our clients.
There is a little known, or used, feature in Aweber that allows us to automatically send out emails to our lists as our blog is populated. Imagine, posting a new blog entry and within minutes the RSS feed [each blog has a special feed goes out to the world for syndication]. It sends the Title, the first few lines of the text, the date and THE LINK BACK to your blog to your existing EMAIL list.
Why do you want to do this?
For one, it says us a massive amount of time. We do not have to post the blog, then go to our email system, then compose and broadcast a new email to our list. Life happens. We get interrupted. It gets put off.
Also, our clients are busy. They do not go to our blog every time WE decide to post a cool tip, trick or discount. The “pushed email” gives them the opportunity to read it when it is a good time for them.

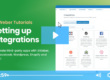
To set this up, simply go into your favorite autoresponder email system Aweber. If you do not use this system, we can help and answer any questions.
Go to Messages, Blog Broadcast. Now, you need the RSS feed URL. Do not freak out. It is not that hard. In Chrome or Firefox browsers, pull up your WordPress blog main page. Right Click on the page and pick “View Source”.
Hit “Cntrl F” for control key + Find. Enter RSS in the search bar. Look at the highlighted code for the http://www.yourblog . com/feed [your URL will be different]. Copy the URL and paste it into the first line of the Aweber setup screen above.
Choose a template on the right for your broadcast. There are many templates. You can play around with them by adding words before or after the code to make it yours.
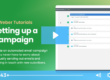
How do I set up the Aweber blog broadcast timing?

The next part is setting up the timing. This is pretty self explanatory. You can send immediately or set it up to go out on certain days and time. Also, select the number of new items is at least #. This way it will only send out a broadcast after a certain number of posts. This limits the emails going to your clients.
Keep the tracking clicks and social sharing boxes checked. That is it. Save the broadcast setup.
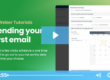
Now, you will send a test message to yourself. This will show you the set up. Go back and forth until it looks likes you want. Schedule it and you are done.
This is one of many ways to stay in touch and provide value to your customers. I wrote another post “what to write in your emails”. This will give you other ideas to enhance your email postings.
Let us know what you think by commenting and sharing below. Until next time, go forth and broadcast!
1 Comment